1. Avoid Manual Adjustments
In Excel, a common situation is that the content of a cell is not fully displayed because it exceeds the existing width and height, or it shows as ######. Manually adjusting the width and height can be a time-consuming and repetitive task. Here are some tips to automatically adjust the width and height.
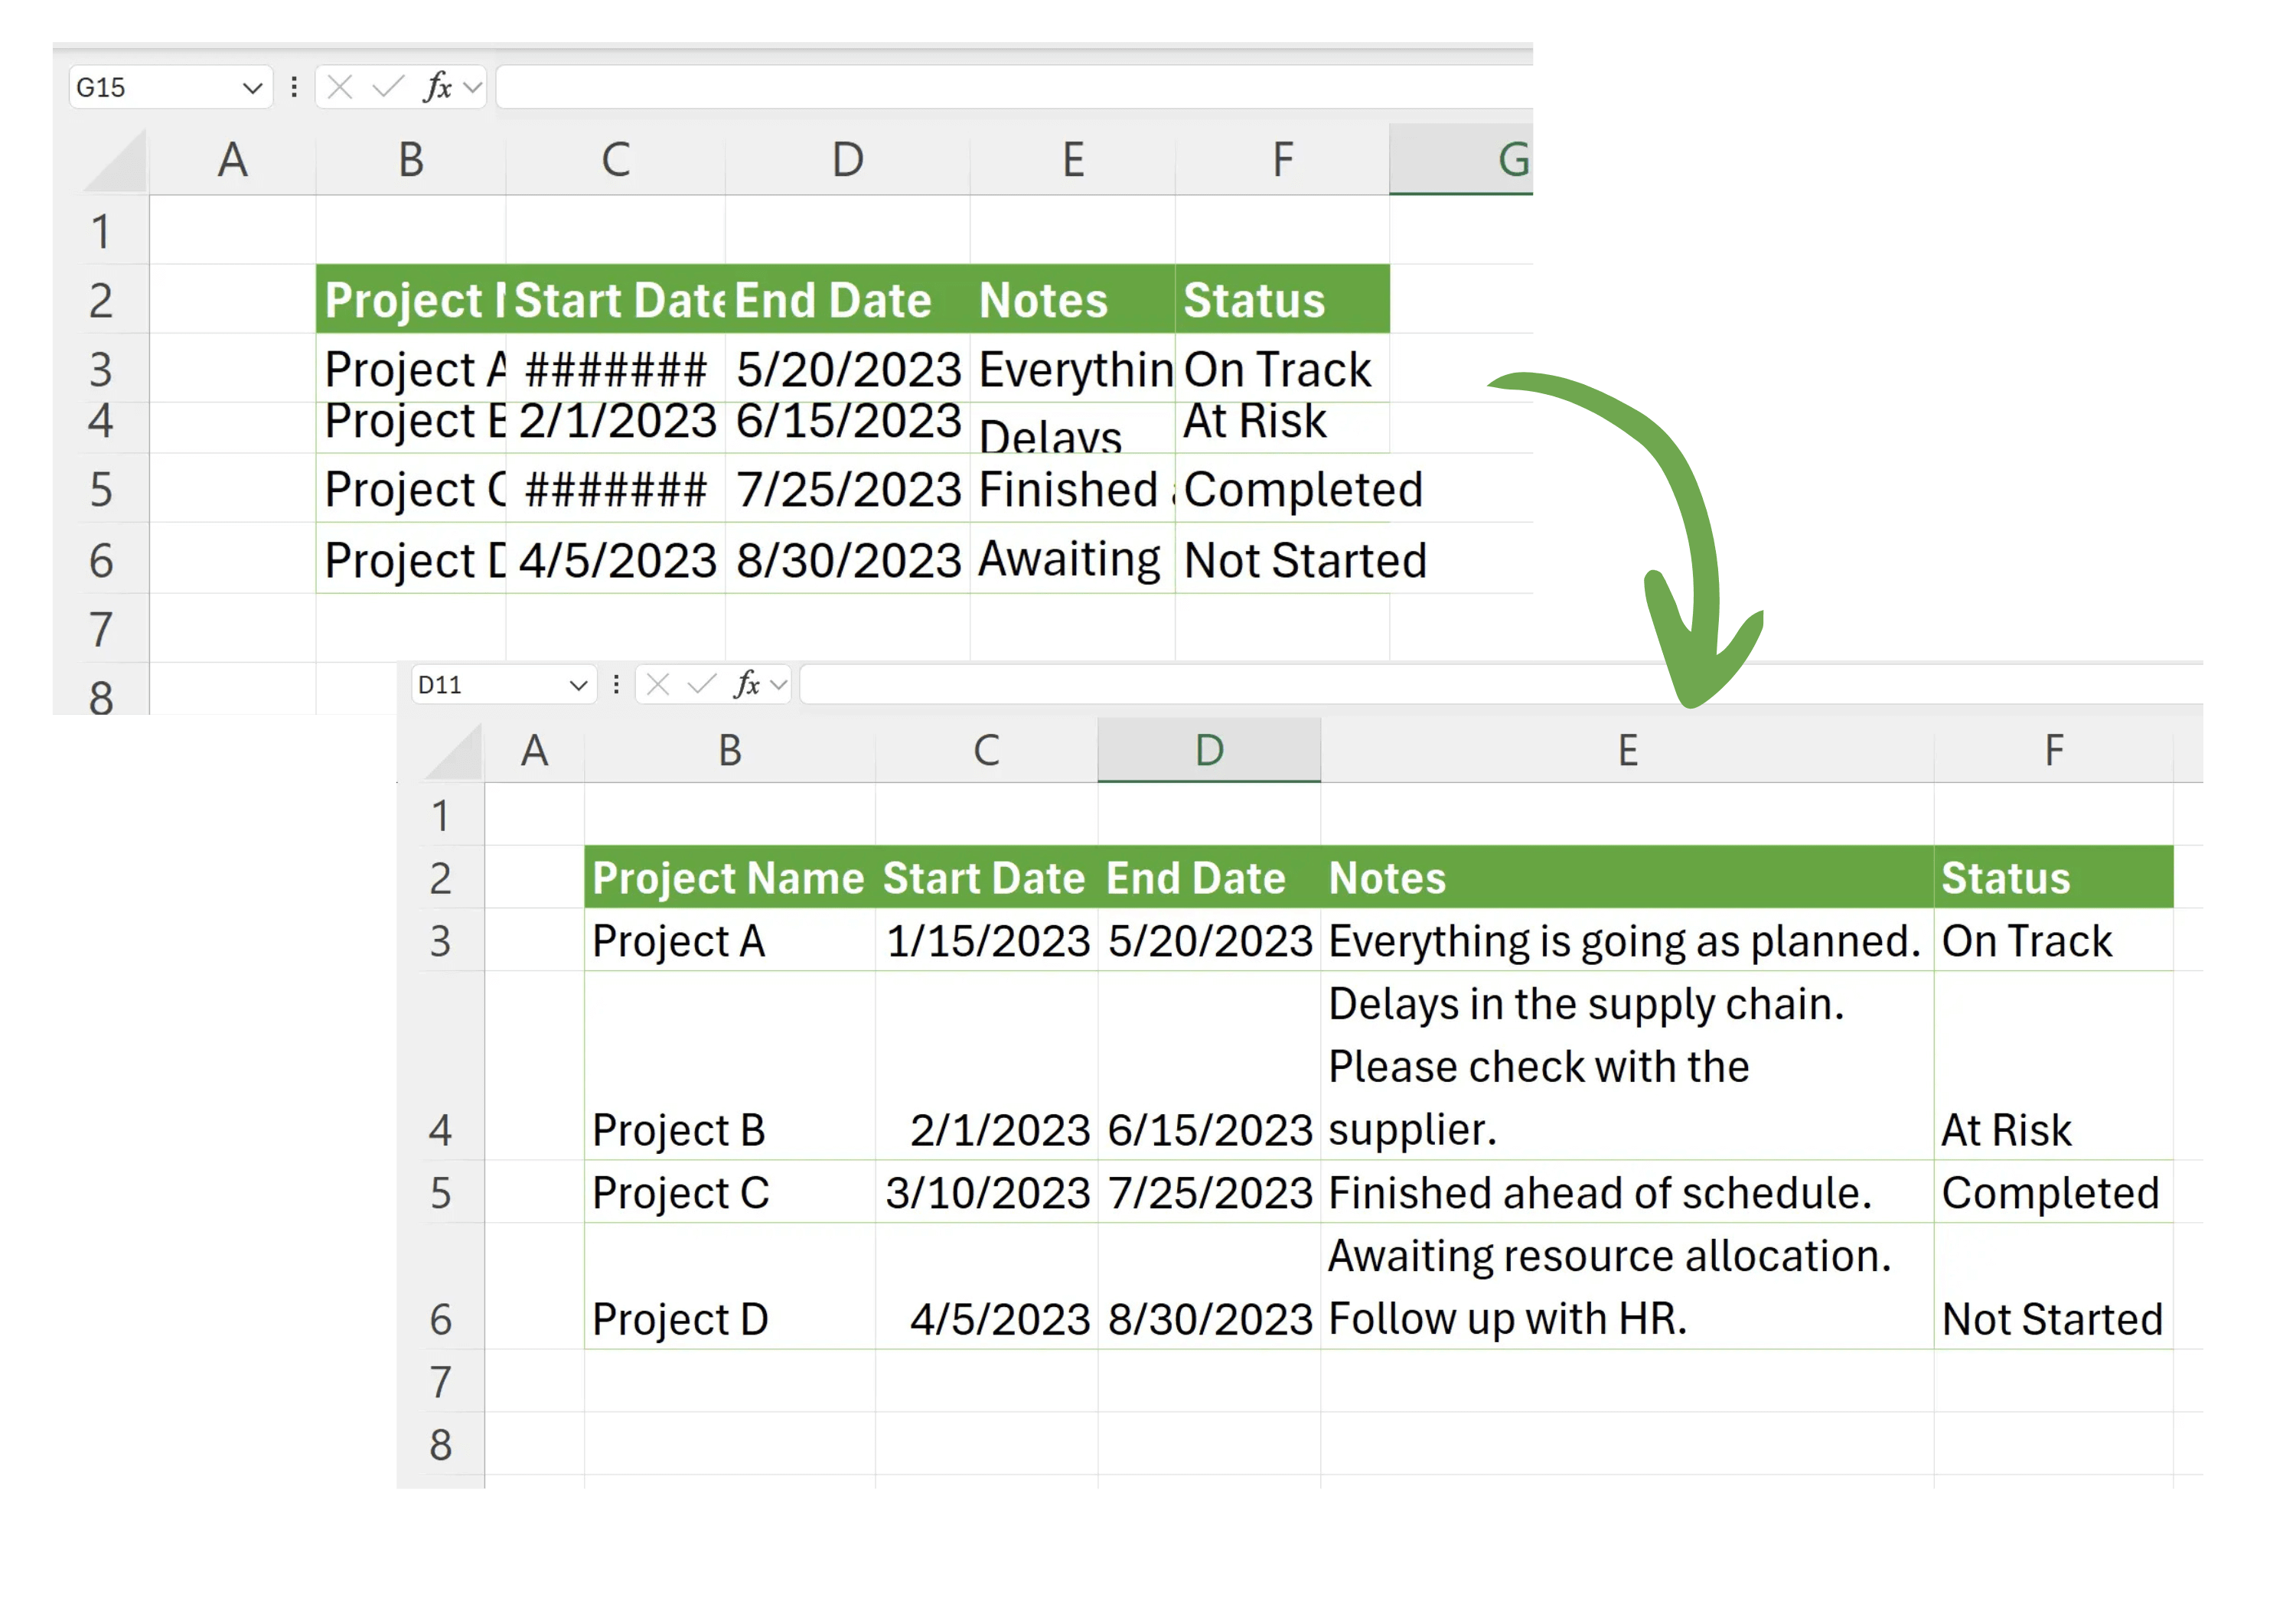
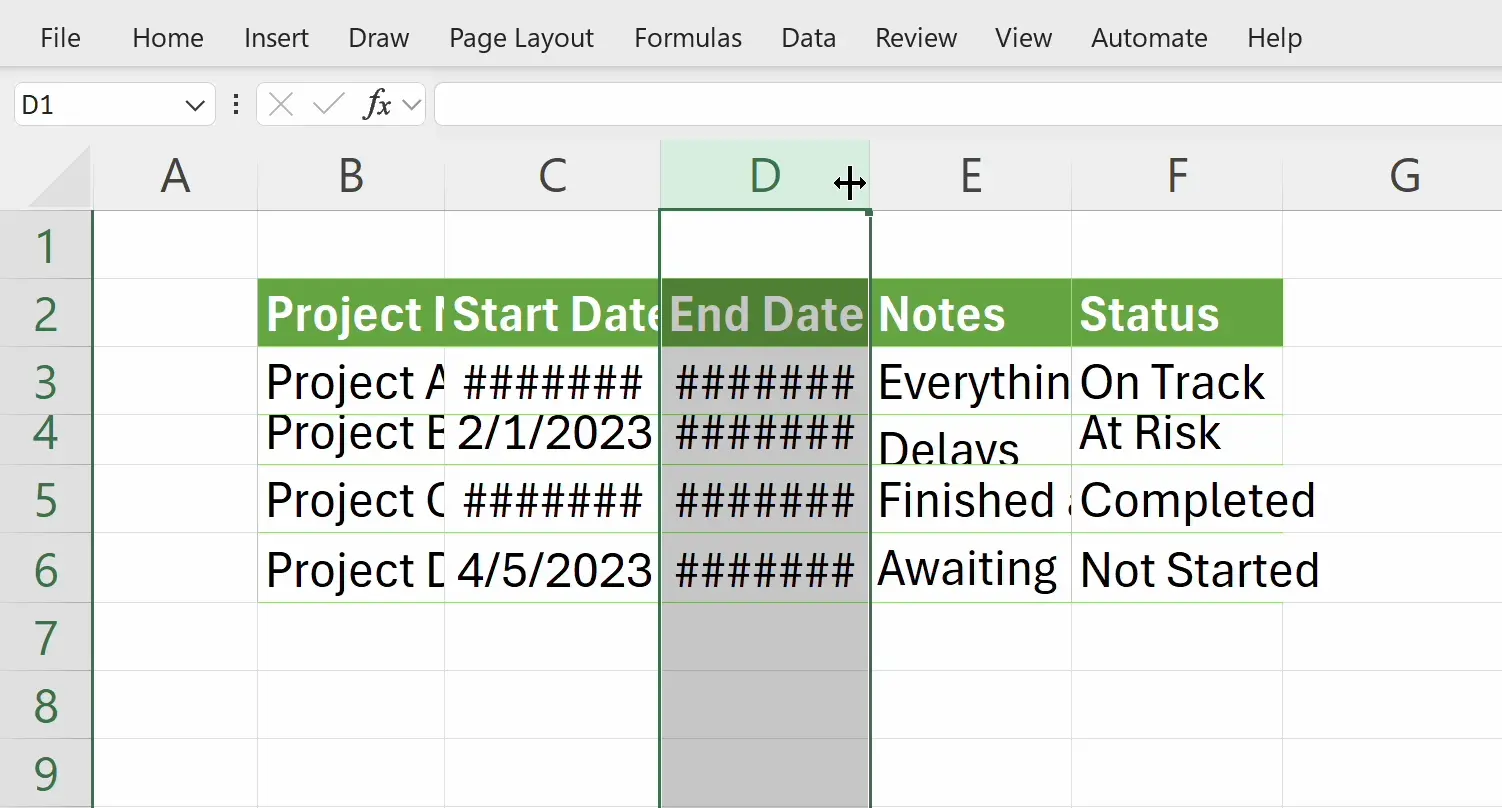
2. Auto Adjusting Rows/Columns
Excel provides a feature to automatically adjust the width and height, which will resize to fully display the content of all cells.
Locate the row or column you wish to adjust, move the mouse to the edge of the row/column header, and when the cursor changes to a double arrow, double-click once to automatically adjust that row or column.
Locate the row or column you wish to adjust, move the mouse to the edge of the row/column header, and when the cursor changes to a double arrow, double-click once to automatically adjust that row or column.
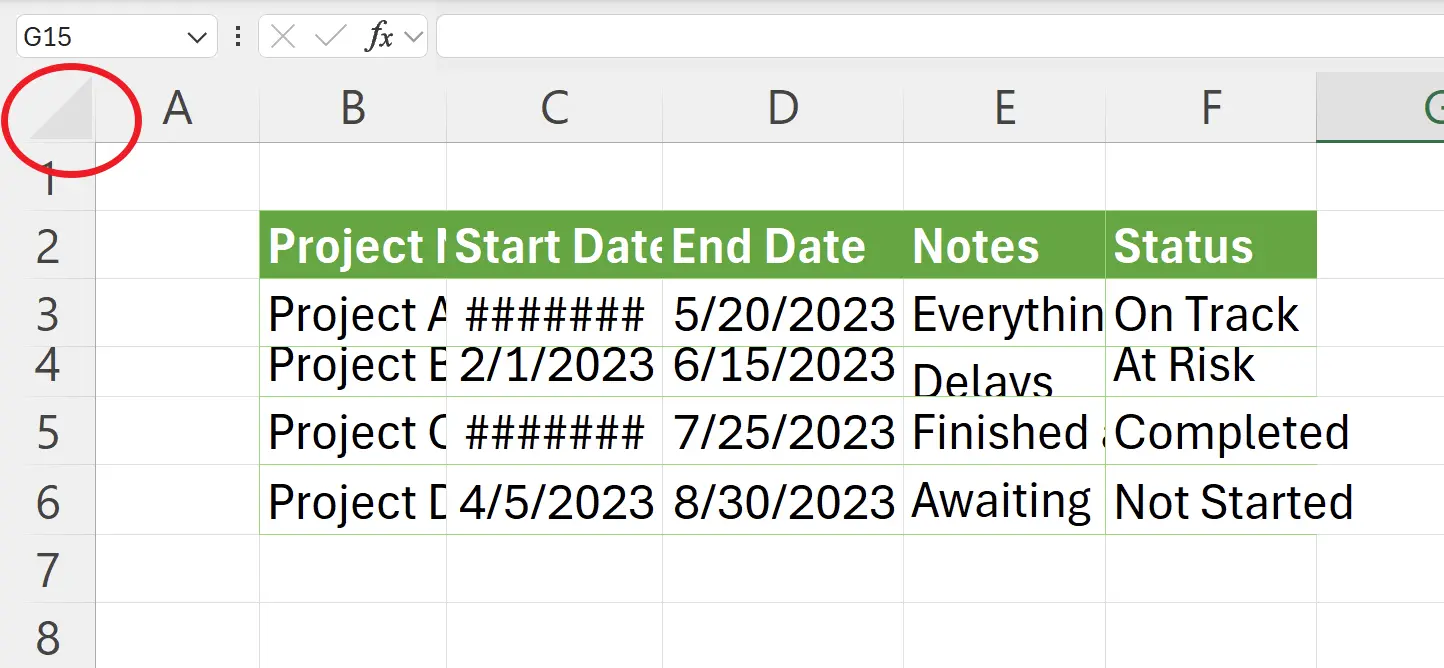
3. Select All Cells
You can also adjust the width and height of all cells in the worksheet at once.
First, click the triangle in the top left corner of the worksheet to select the entire worksheet.
First, click the triangle in the top left corner of the worksheet to select the entire worksheet.
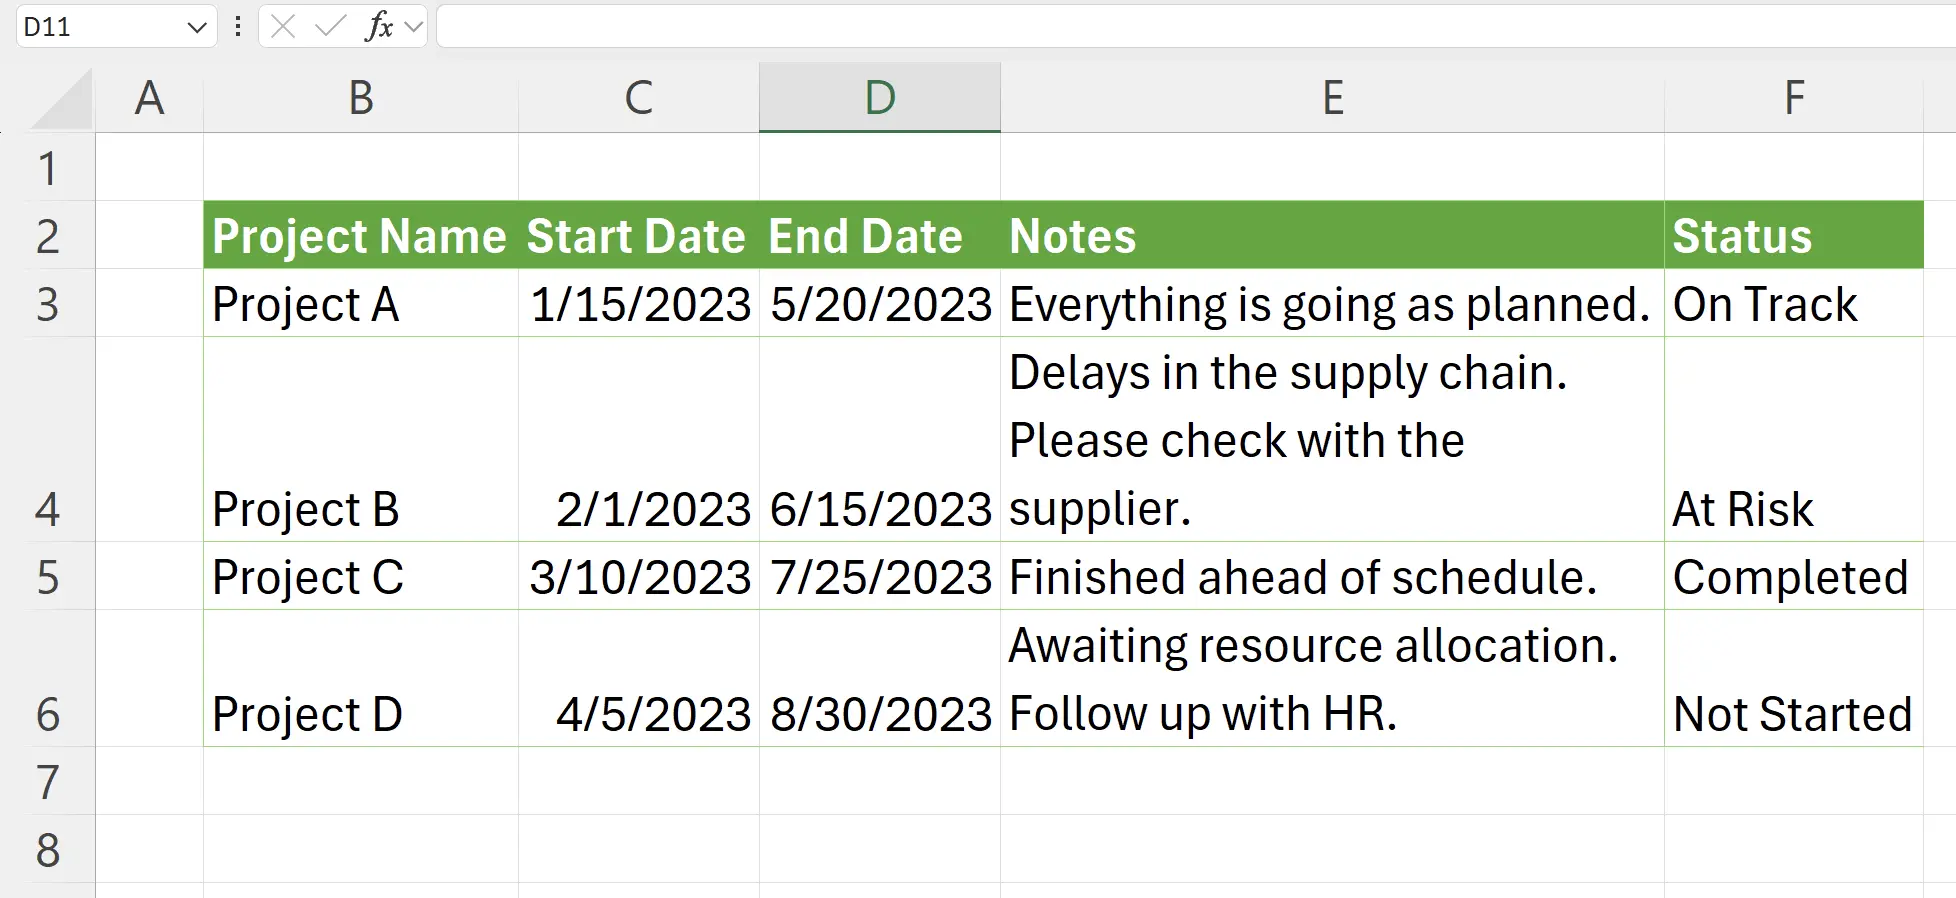
4. Auto Adjusting All Cells' Width and Height
Here, we find a row header and a column header, then move to the edge of the row header and column header. When the mouse turns into a double arrow, double-click once on each. This will automatically adjust all rows and columns.
5. Task Completed
Now, we have successfully adjusted the width and height of the worksheet. Time-saving and visually appealing!
6. 🎉 Finish! 🎉
Author's Note: I hope you can feel the effort I put into these tutorials. I hope to create a series of very easy-to-understand Excel tutorials.If it is useful, help me share these tutorials, thank you!
Follow me:
Related Tutorials