1. Introduction to the LET Function
The LET function in Excel enhances the efficiency and readability of formulas by enabling you to define and name values or calculations within a single formula. This is especially useful for reducing redundancy in complex calculations.
2. Parameters of the LET Function
Here is the syntax for using the
LET function.=LET(name1, name_value1, calculation_or_name2, [name_value2, calculation_or_name3...])name1: required The first name to assign. Must start with a letter. Cannot be the output of a formula or conflict with range syntax. name_value1: required The value that is assigned to name1. calculation_or_name2: required One of the following name_value2: optional calculation_or_name3: optional 3. Example Scenario
Suppose you have a shopping list with product prices and you want to calculate the total price including tax for multiple products.
4. Getting Started with the LET Function
Type on the keyboard:
=LET(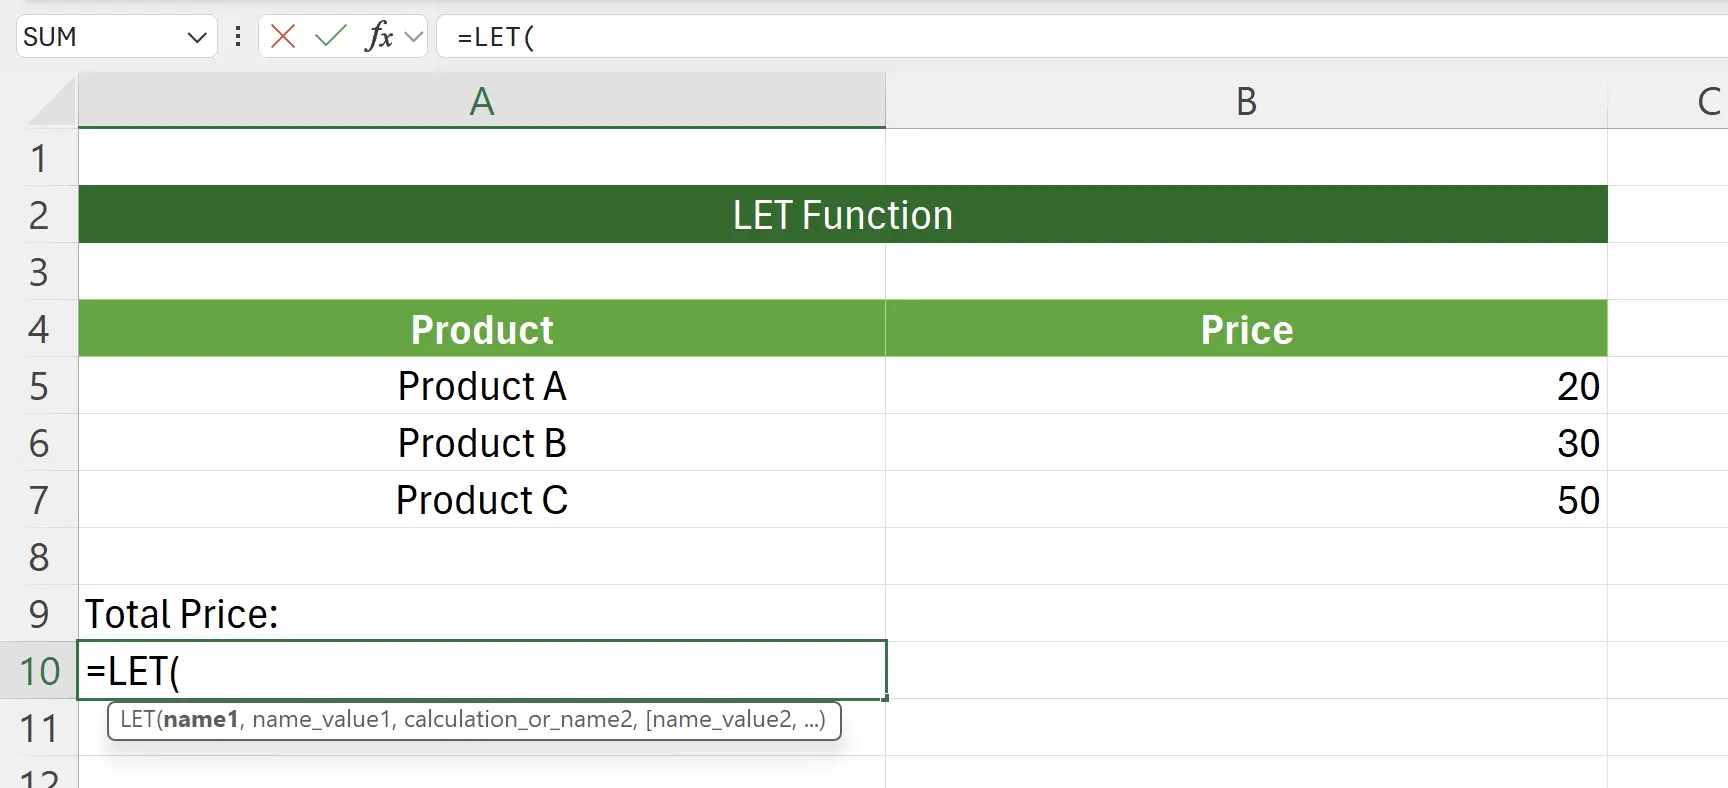
5. Define the first pair of names and values
First, we calculate the total price of the products:
SUM(B5:B7) and save the calculation result to the name: totalPrice.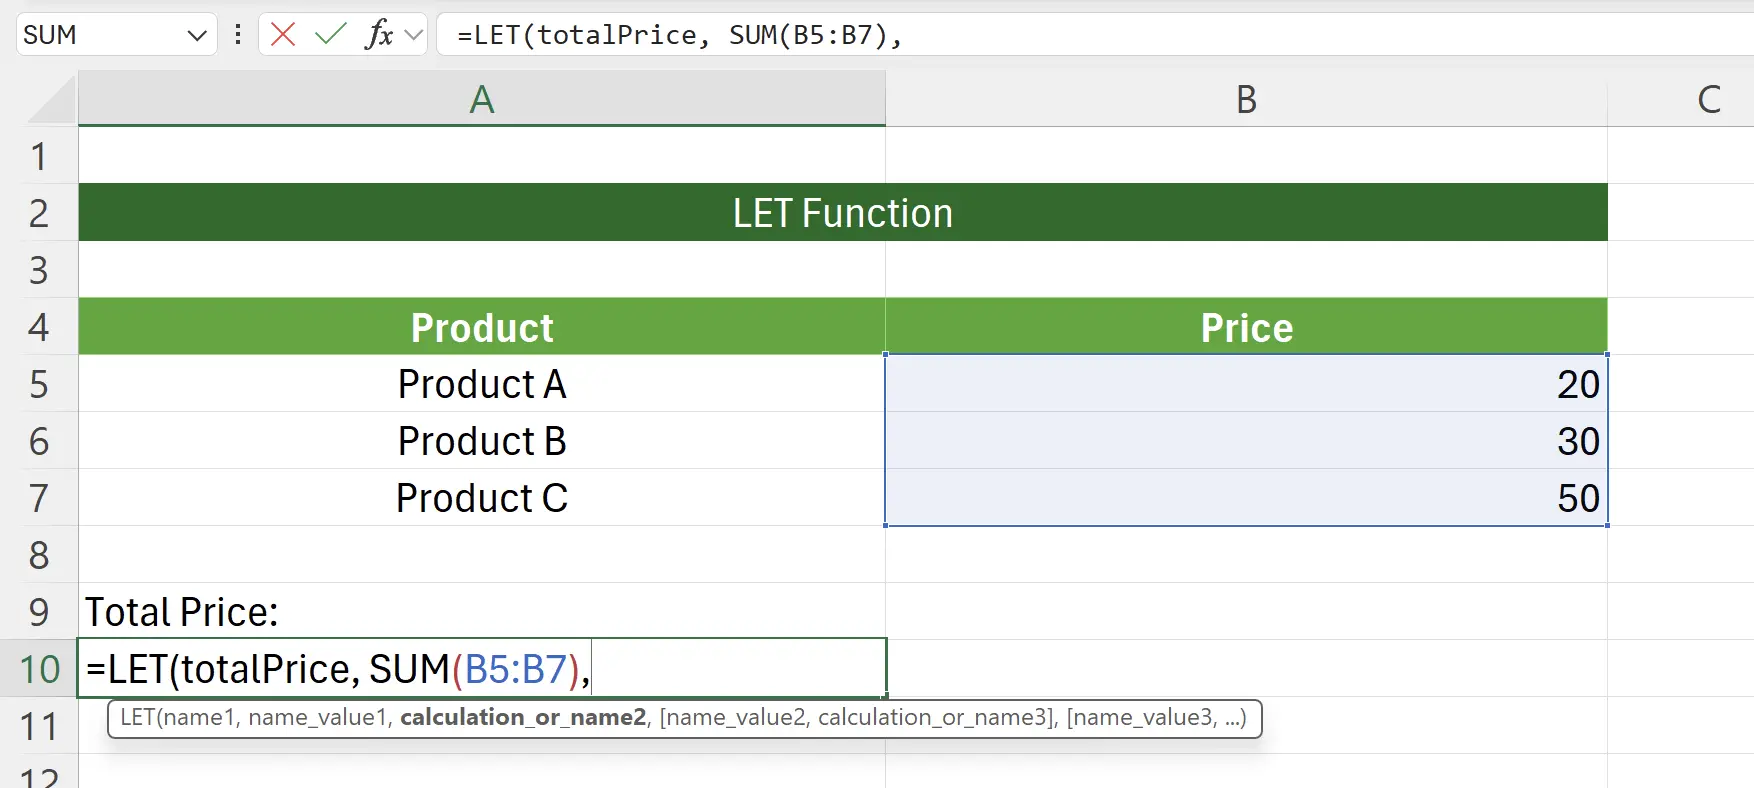
6. Define the second pair of names and values
Next, we calculate the tax at a rate of
8%: totalPrice * 0.08, and save the calculation result to the name: totalTax.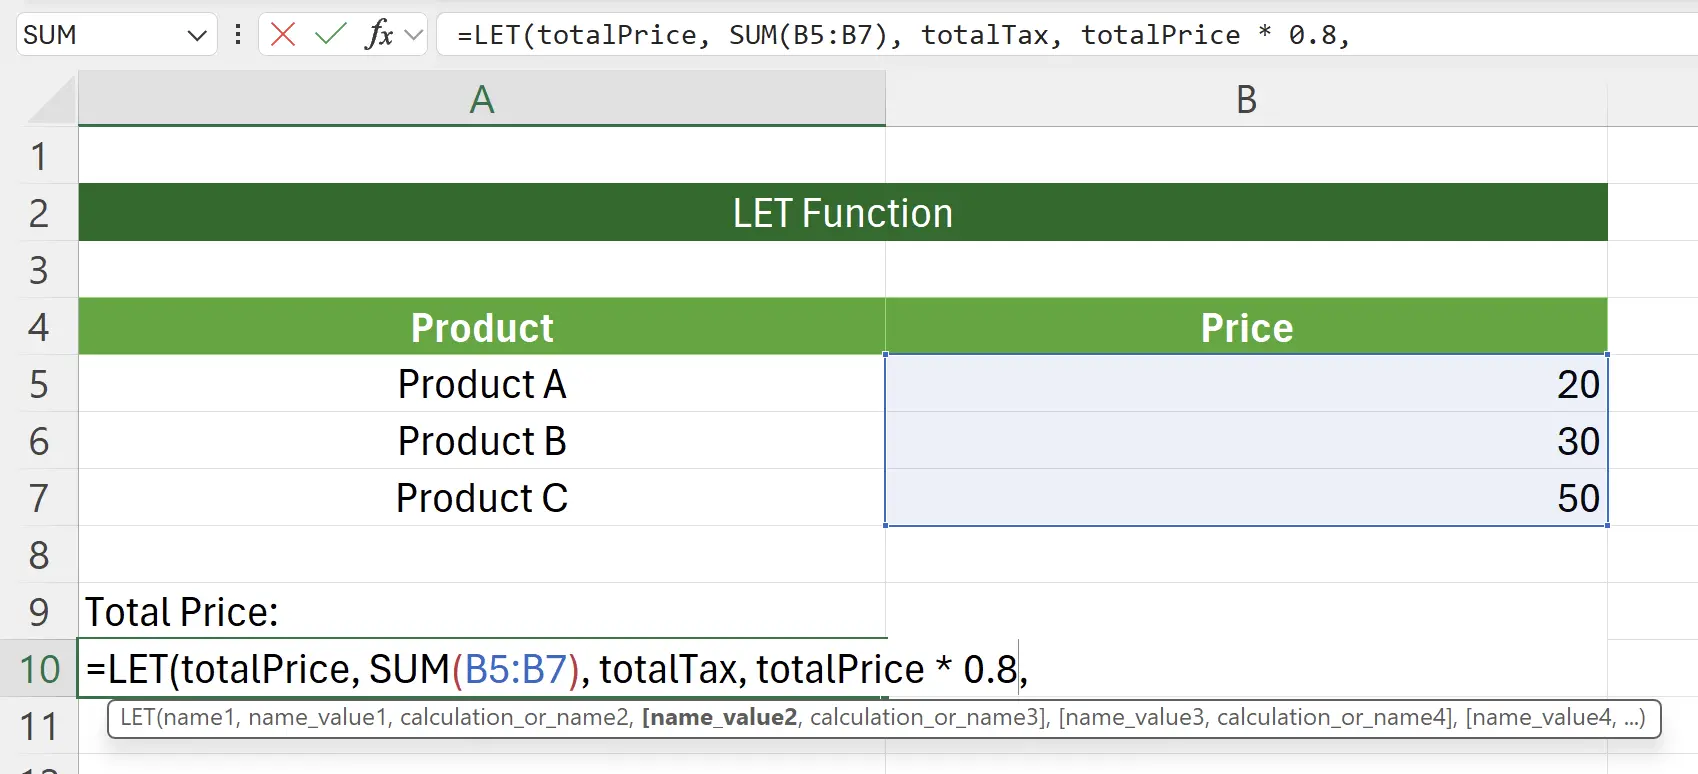
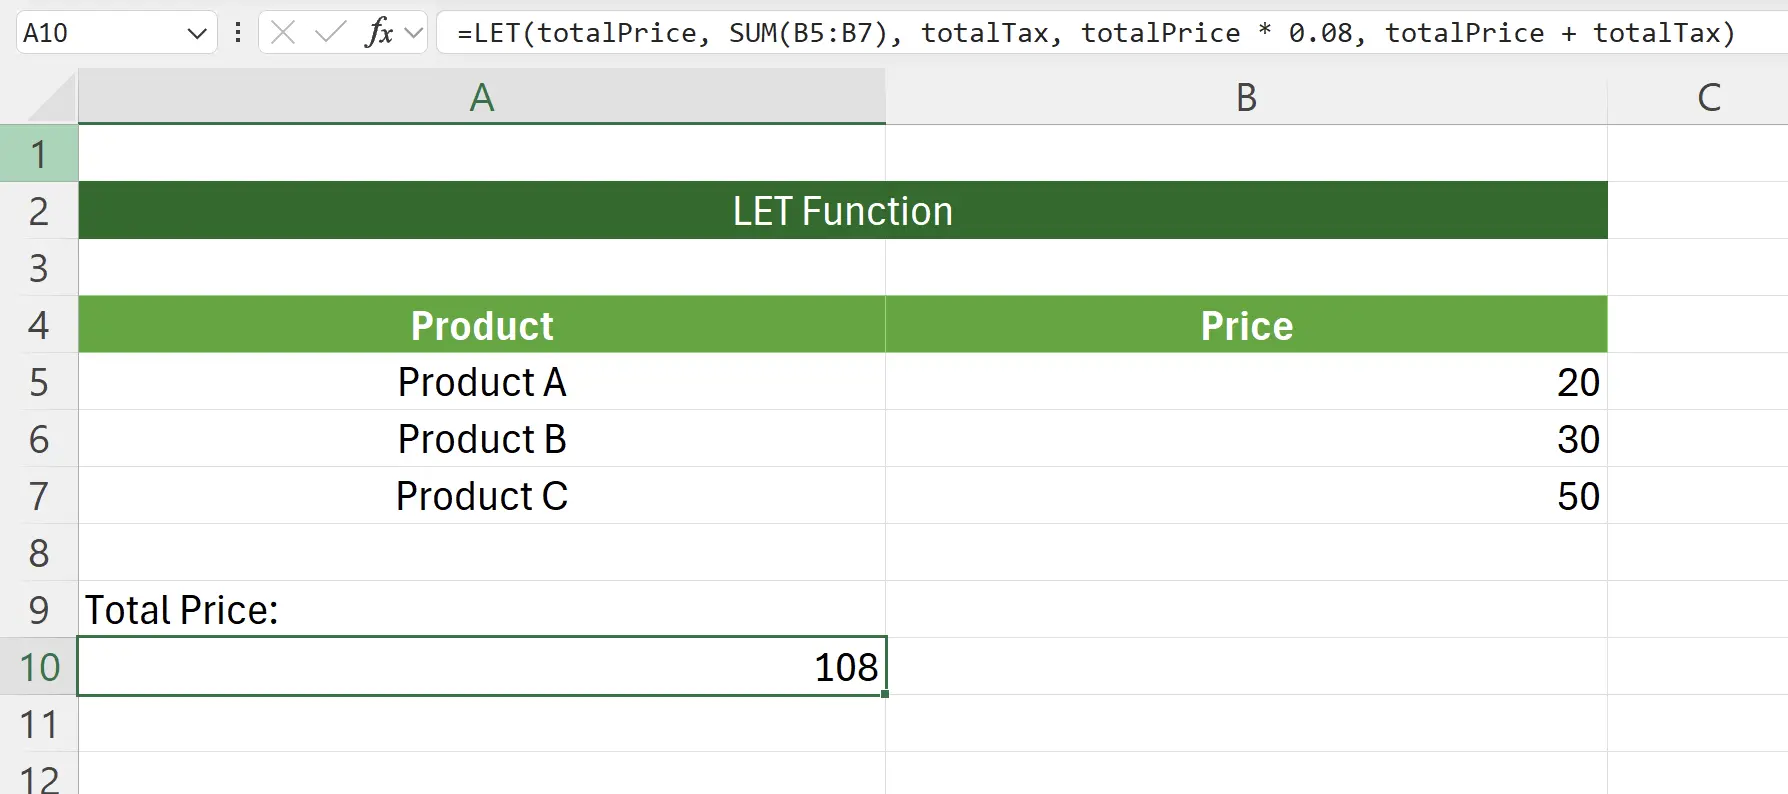
7. Calculate the final price
At this point, the total price of the products is
totalPrice, and the related tax is totalTax. Now we calculate the final price: totalPrice + totalTax.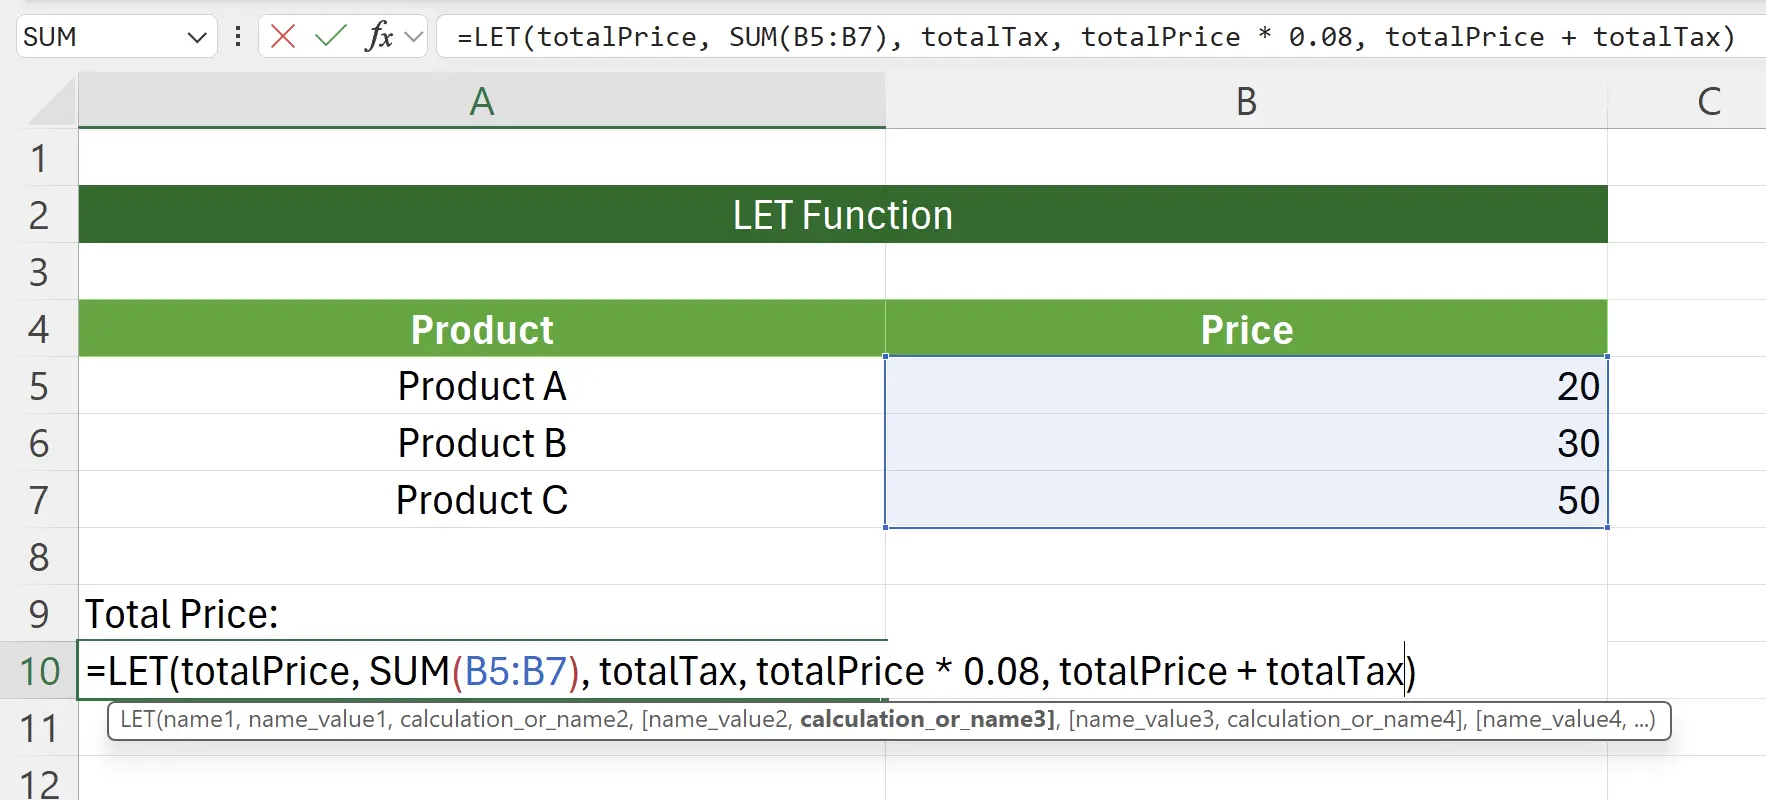
8. Activate the LET function
After pressing Enter to save, we can see that the final price is
108.9. 🎉 Finish! 🎉
Author's Note: I hope you can feel the effort I put into these tutorials. I hope to create a series of very easy-to-understand Excel tutorials.If it is useful, help me share these tutorials, thank you!
Follow me:
Related Tutorials