1. Introduction to the WRAPROWS Function
Using the WRAPROWS function, you can convert a long row of data into a tabular format. Data is transformed from a one-dimensional array into a two-dimensional table.
2. Parameters of the WRAPROWS Function
Here is the syntax for using the
WRAPROWS function.=WRAPROWS(vector, wrap_count, [pad_with])vector: required The vector or reference to wrap. wrap_count: required The maximum number of values for each row. Simply put, it determines how many columns of data are obtained. pad_with: optional If the size of the array is not a multiple of the wrap_count parameter, this parameter is used to fill extra cells. By default, it is filled with #N/A. 3. Getting Started with the WRAPROWS Function
Type on the keyboard:
=WRAPROWS(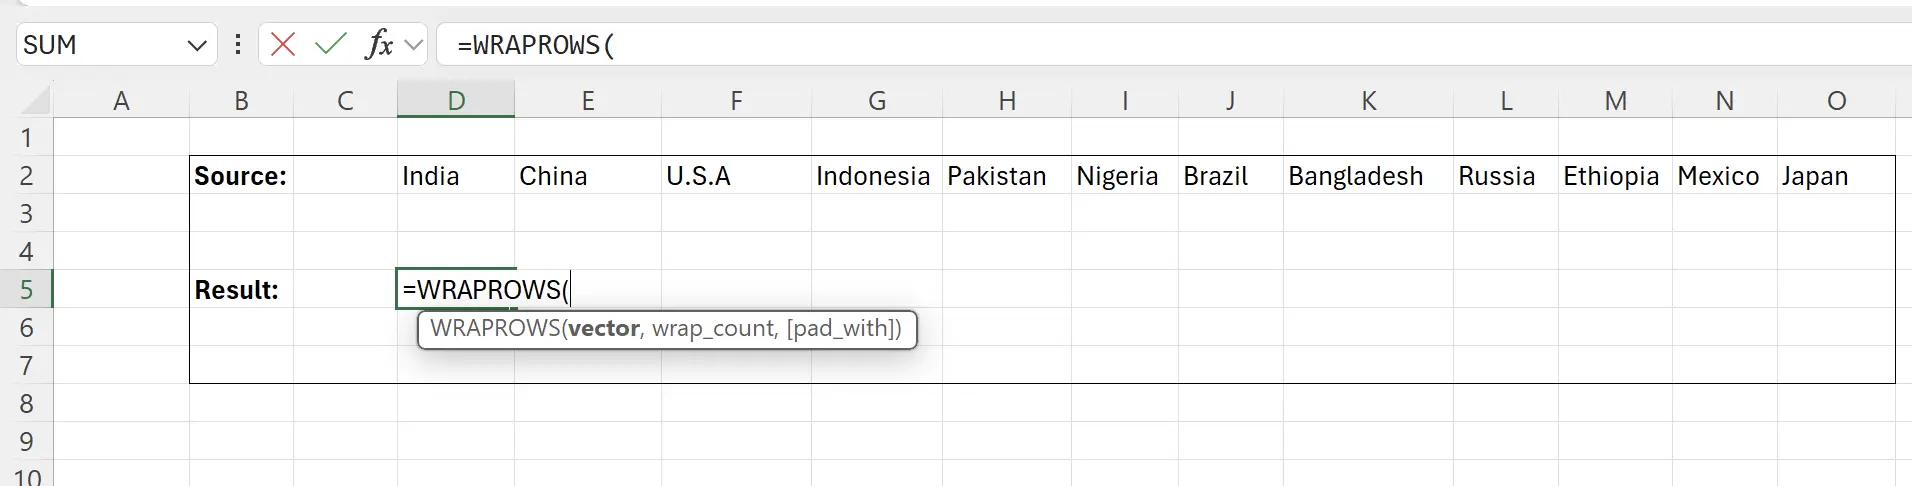
4. Select the Source Data Range
At this point, the function prompts you to select the source data range. Click on the starting cell of the source data
D2, then hold the Shift key and click on the ending cell of the source data O2, which allows you to select the content of the source data and fill it into the function parameter: =WRAPROWS(D2:O2.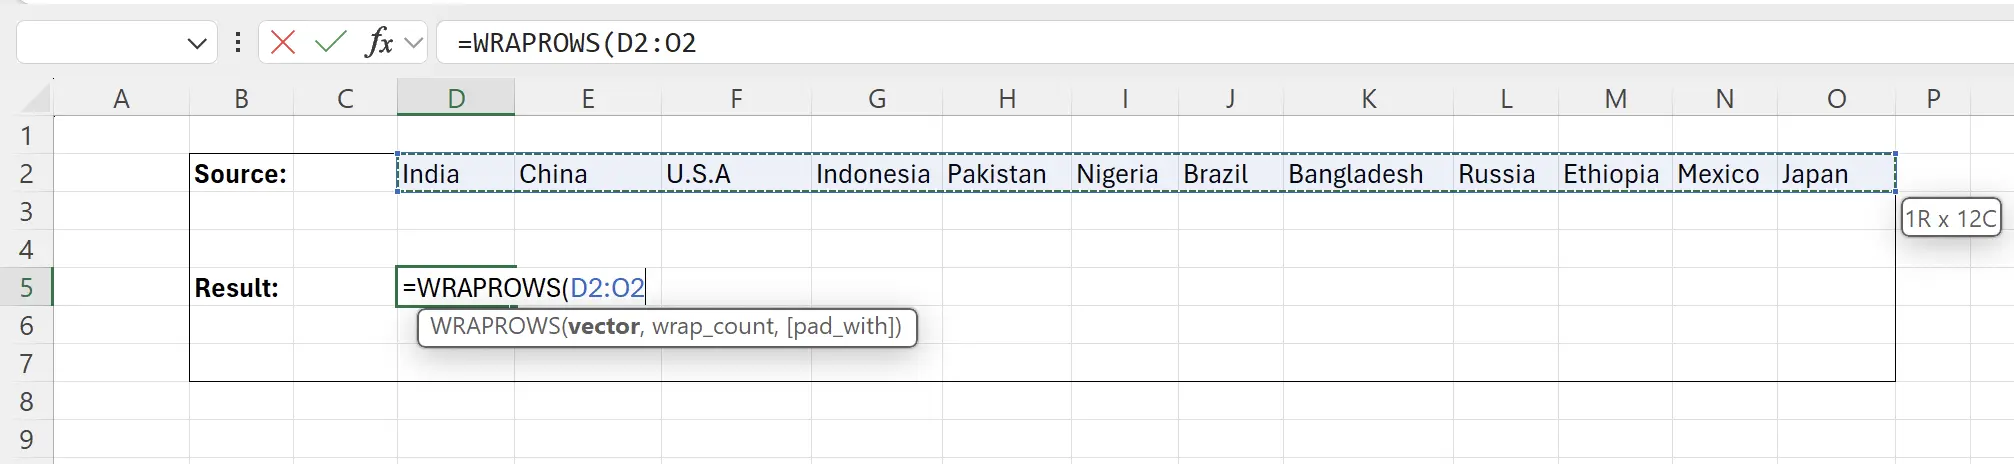
5. Specify How Many Columns of Data to Convert
Here we set to convert the data into a table with 5 columns. At this point, the function is:
=WRAPROWS(D2:O2, 5)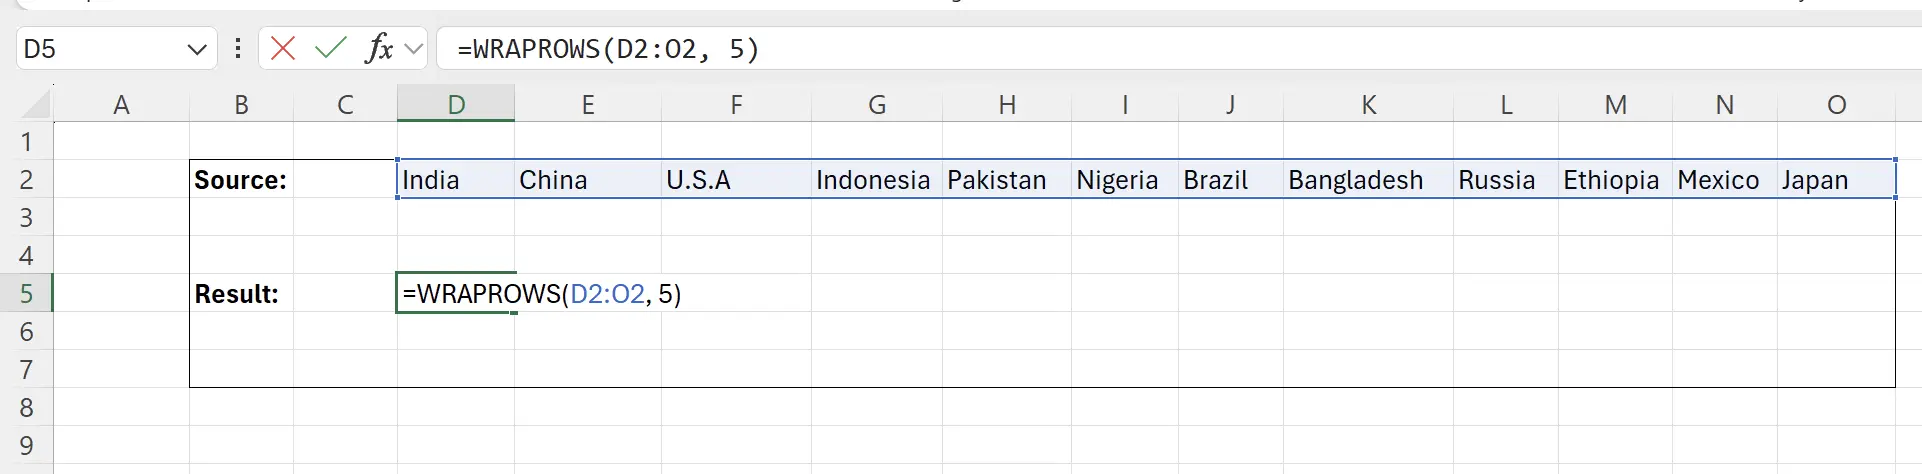
6. Press the Enter Key
Now we can see that the data has been converted into a two-dimensional table with 5 columns.
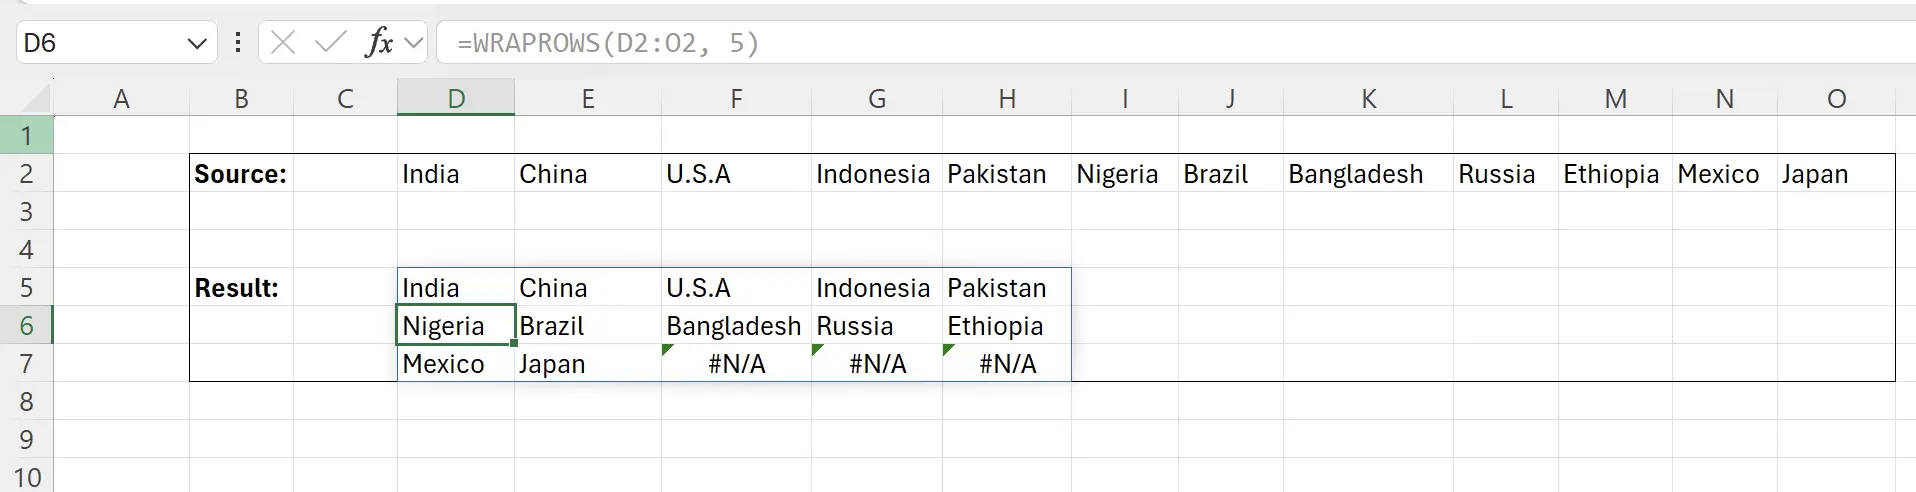
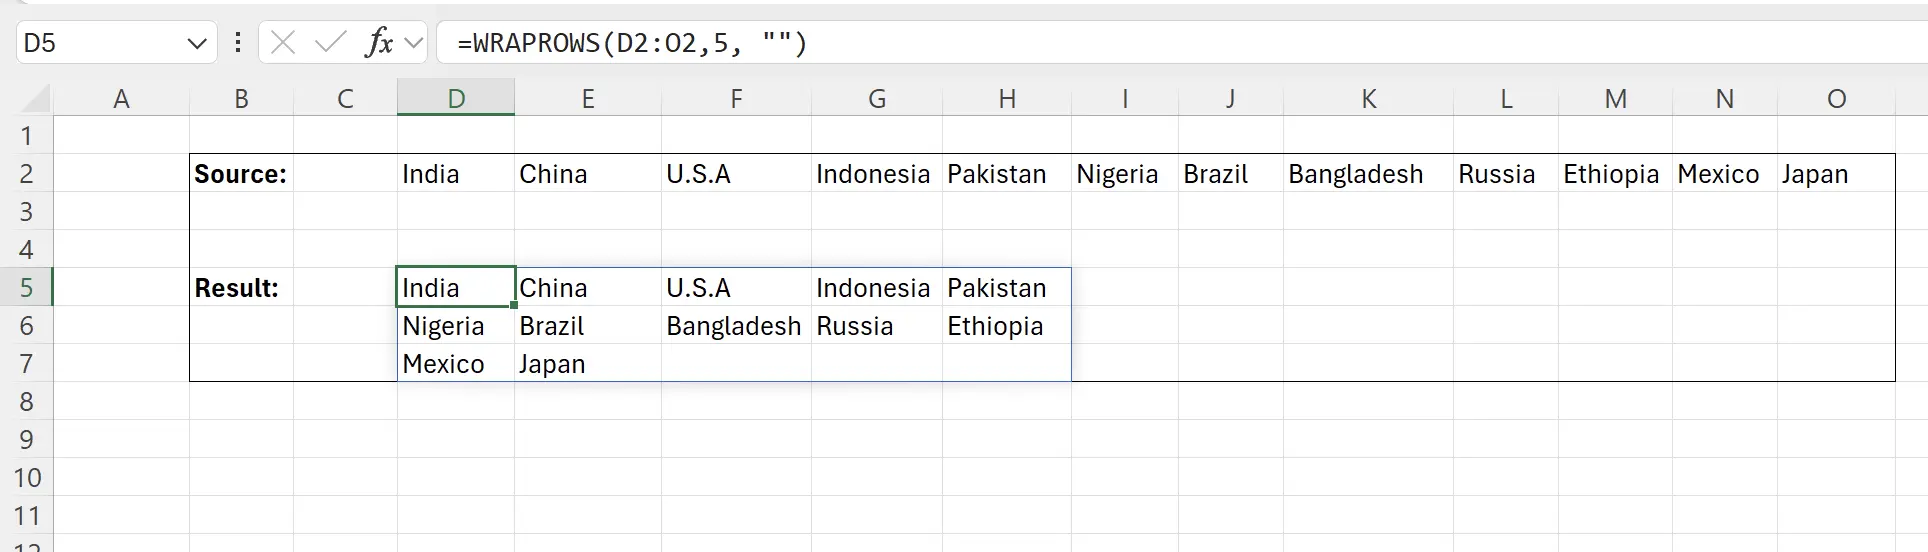
7. Empty Data Displays as #N/A
You may notice that some data is displayed as
#N/A, which is because there is no data to display here.8. Replace #N/A with an Empty String
We can input the third parameter as:
"", and then press the Enter key to save.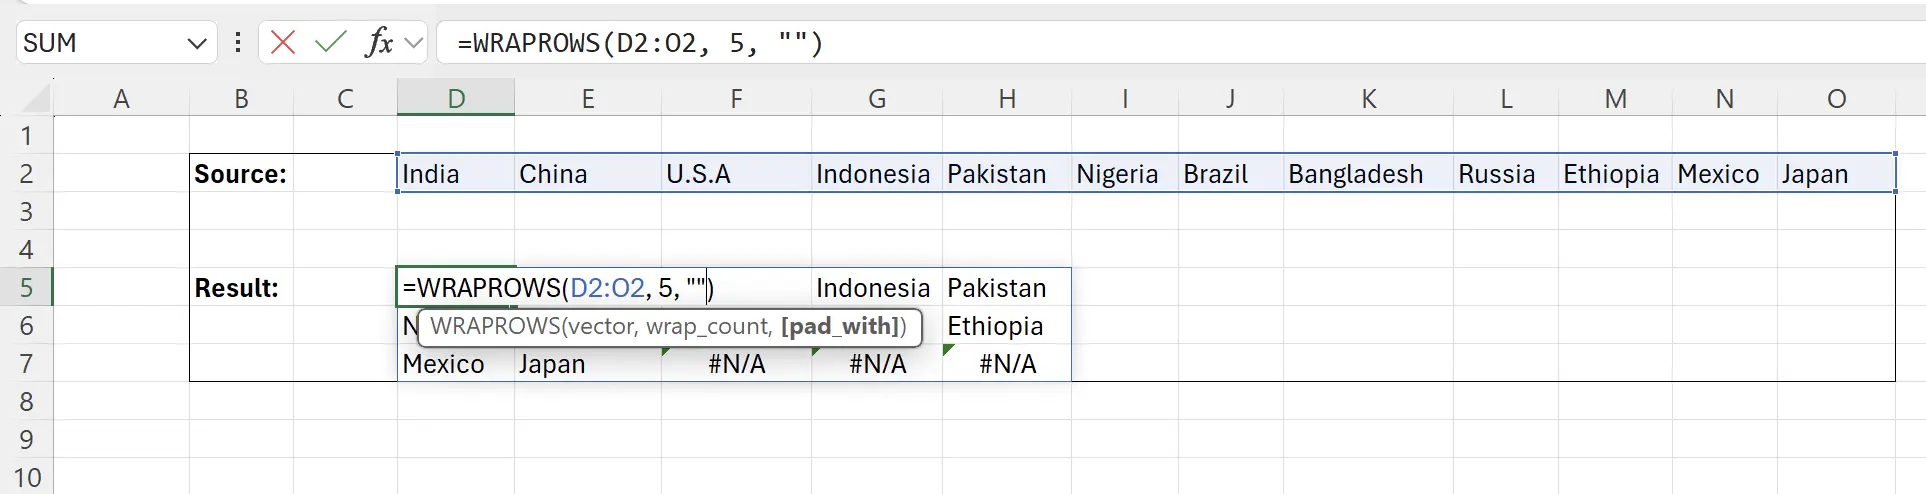
9. Task Completed
This way, we have transformed the data into the desired format.
Extension Tip: If
Extension Tip: If
wrap_count is 1, it will convert a row of data into a column of data.10. 🎉 Finish! 🎉
Author's Note: I hope you can feel the effort I put into these tutorials. I hope to create a series of very easy-to-understand Excel tutorials.If it is useful, help me share these tutorials, thank you!
Follow me:
Related Tutorials