1. Autofill
Autofill is a core feature of Excel that provides great convenience during data entry.
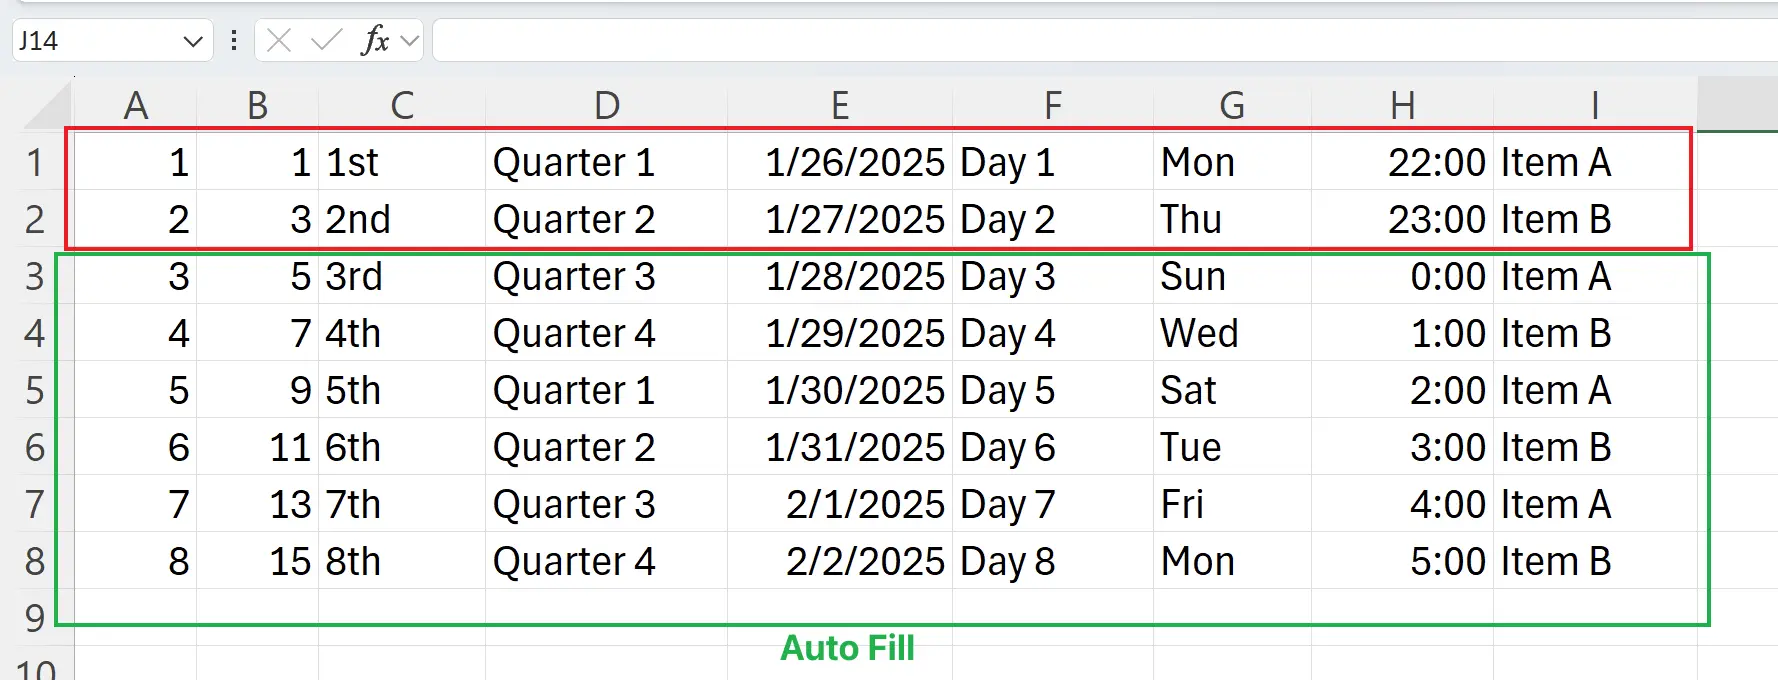
Here are some common autofill data patterns: serial numbers, dates, times, quarters, nouns, and some custom repeated data.
Here are some common autofill data patterns: serial numbers, dates, times, quarters, nouns, and some custom repeated data.
2. Autofilling by Dragging
First, select
Similarly, you can fill rows this way.
Note that if you only select
A1 and A2 cells. When the mouse icon turns into a solid cross shape, drag it down to automatically generate sequential numeric entries. Similarly, you can fill rows this way.
Note that if you only select
A2, dragging down will only generate a series of the number 2. So if the autofill content doesn’t meet your expectations, try selecting multiple cells to trigger autofill.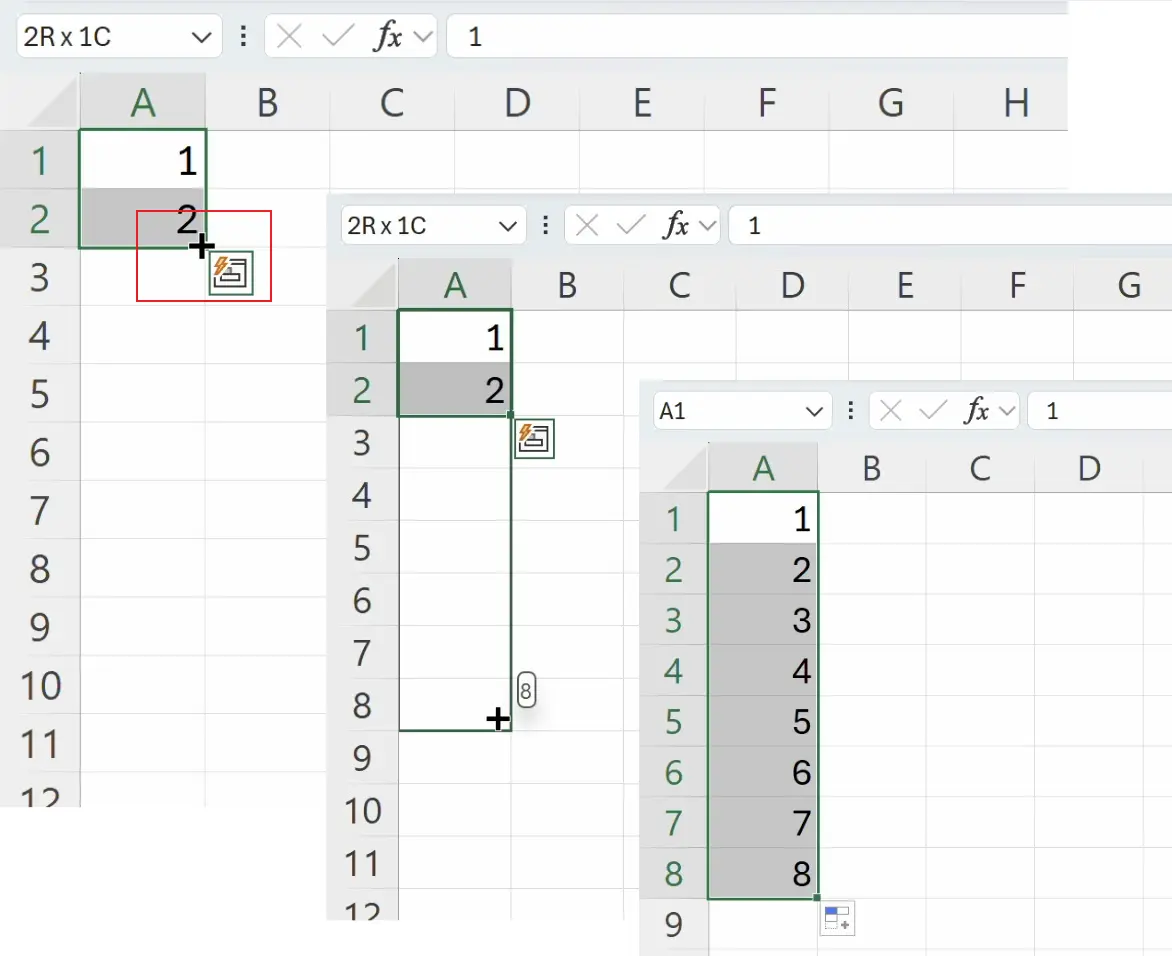
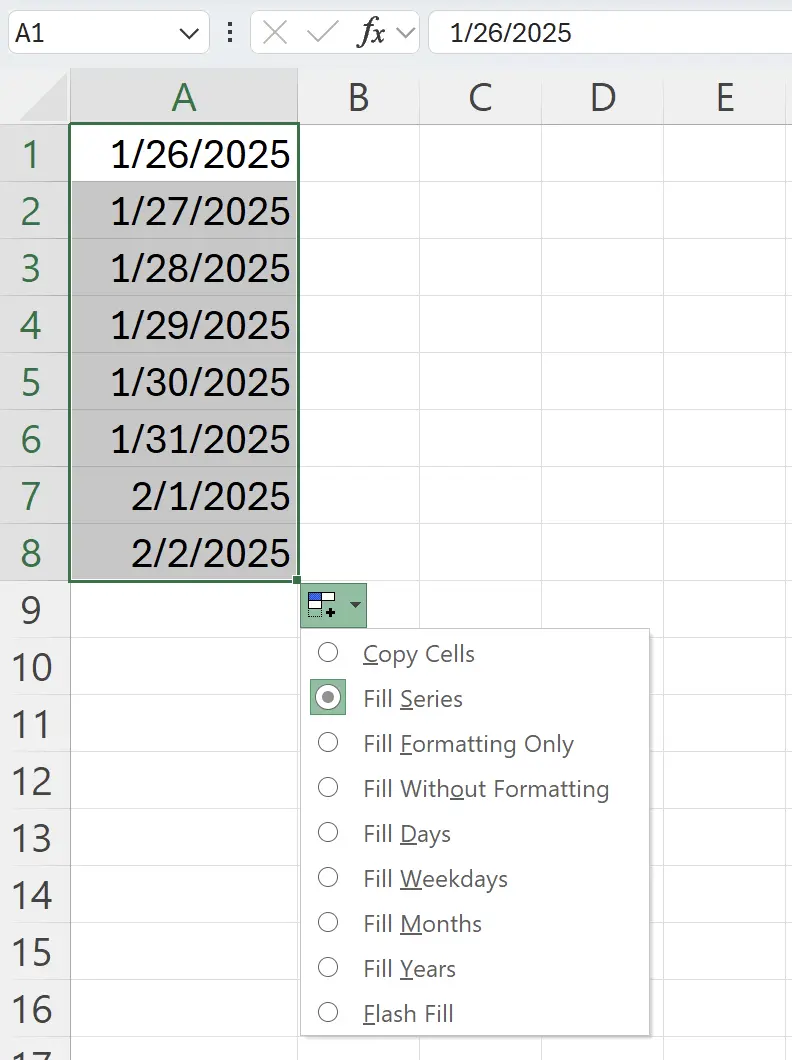
3. Switching Fill Types When Filling Date Sequences
When filling in date data, we can also switch the type of dates being filled.
4. Quick Filling Data by Specifying Fill Quantity
When we have a large volume of data to fill, dragging can become cumbersome.
At this point, we can quickly fill data by specifying the fill quantity.
Under the
At this point, we can quickly fill data by specifying the fill quantity.
Under the
Home tab in the Editing group, click on Fill, then select Series.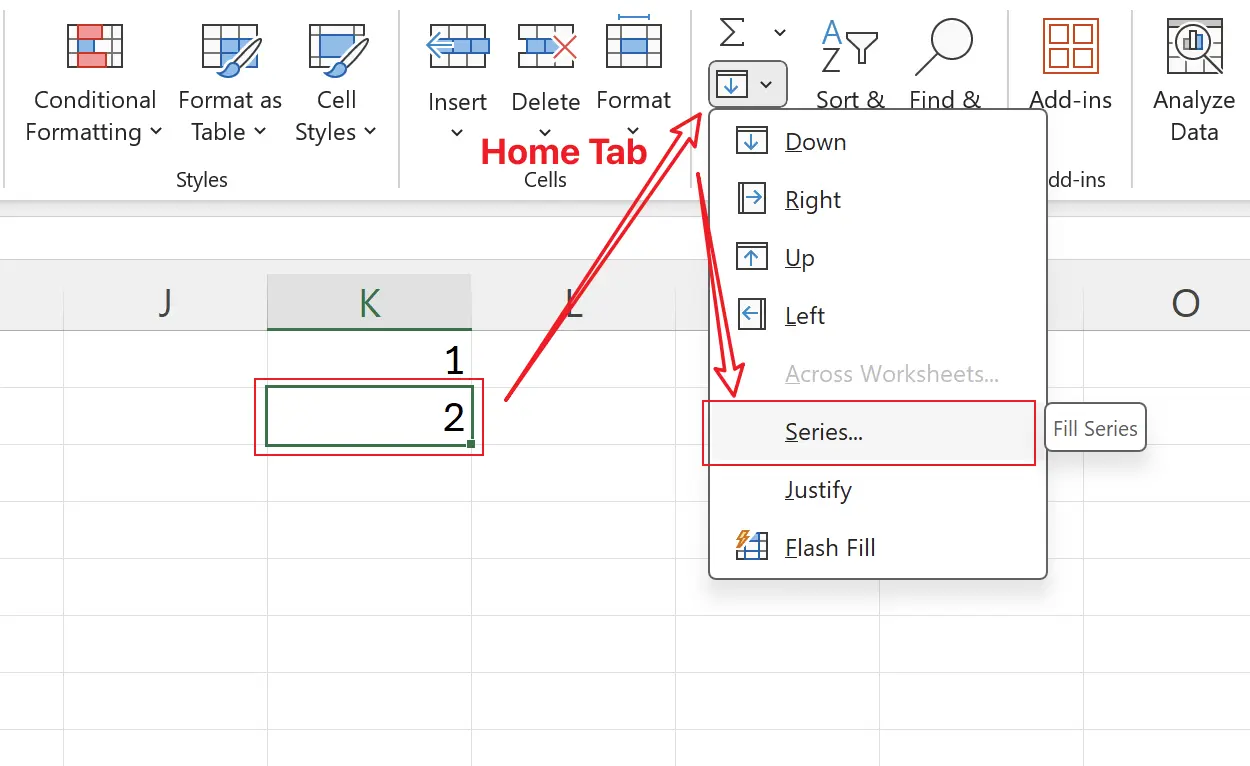
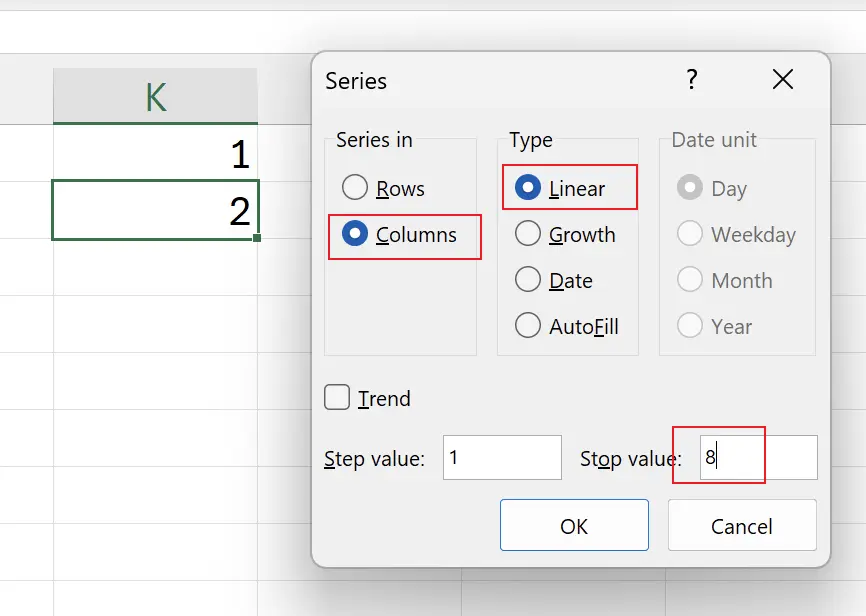
5. Defining the Final Value for the Fill
Here we choose the fill direction as: column, select the fill type as: linear, and then enter the final fill value as
Click OK.
8. Click OK.
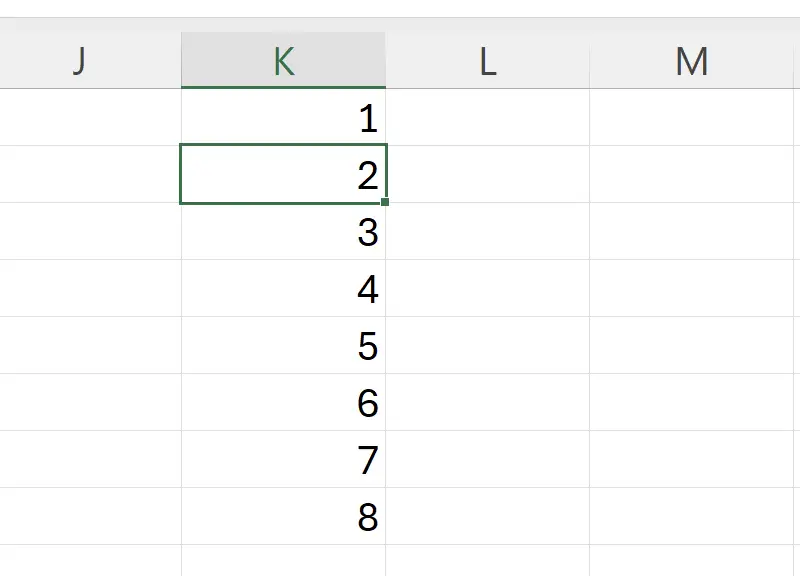
6. Results of the Fill
Here we achieve the same result as the drag fill, but save the dragging process.
7. Customizing the Autofill Content
We can also customize the content for autofill.
Under the
Under the
File tab in Options, click on Advanced, and then find Edit Custom Lists.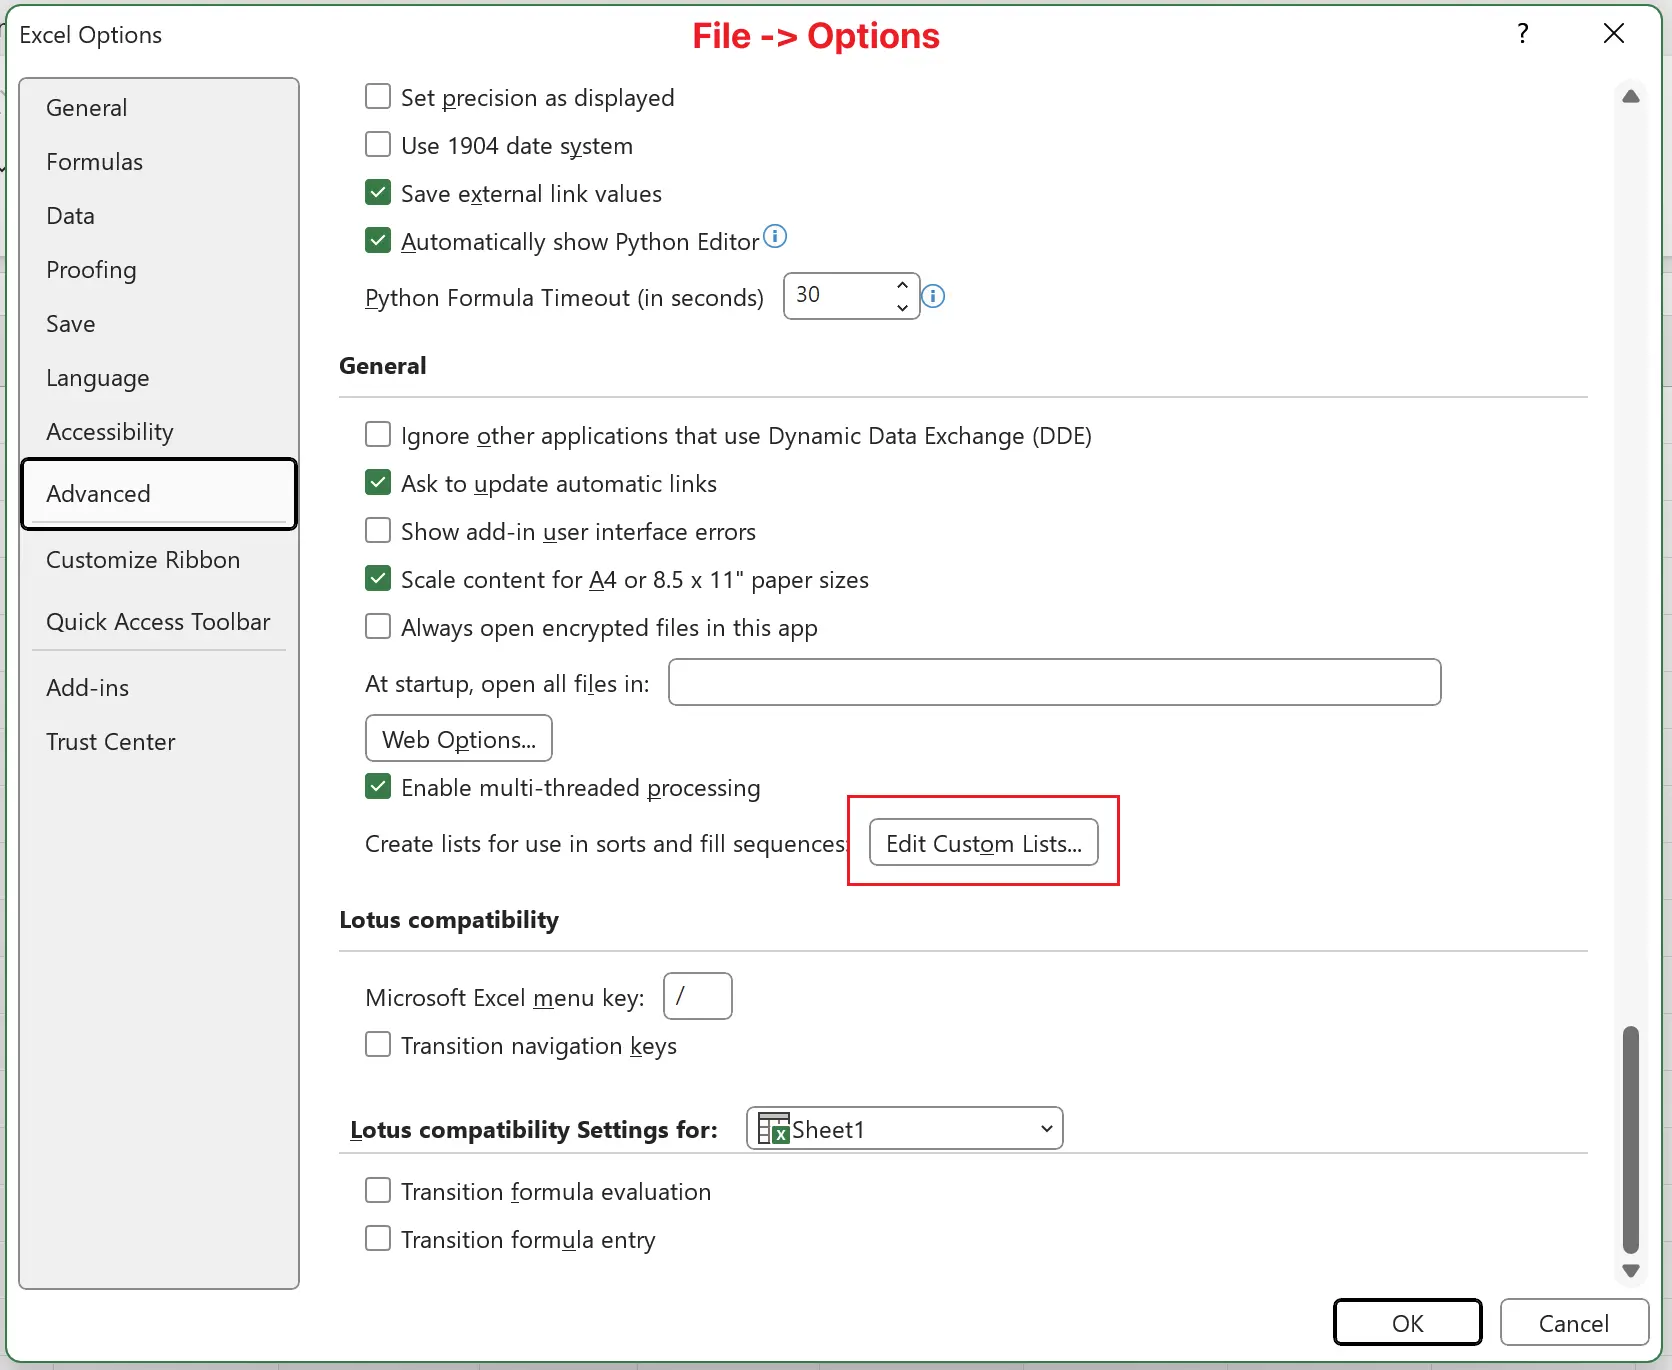
8. Editing Custom Lists
In
Click on
Click
Custom Lists, we can see Excel’s default custom lists. Click on
NEW LIST, then enter our custom list content. Click
Add, then OK.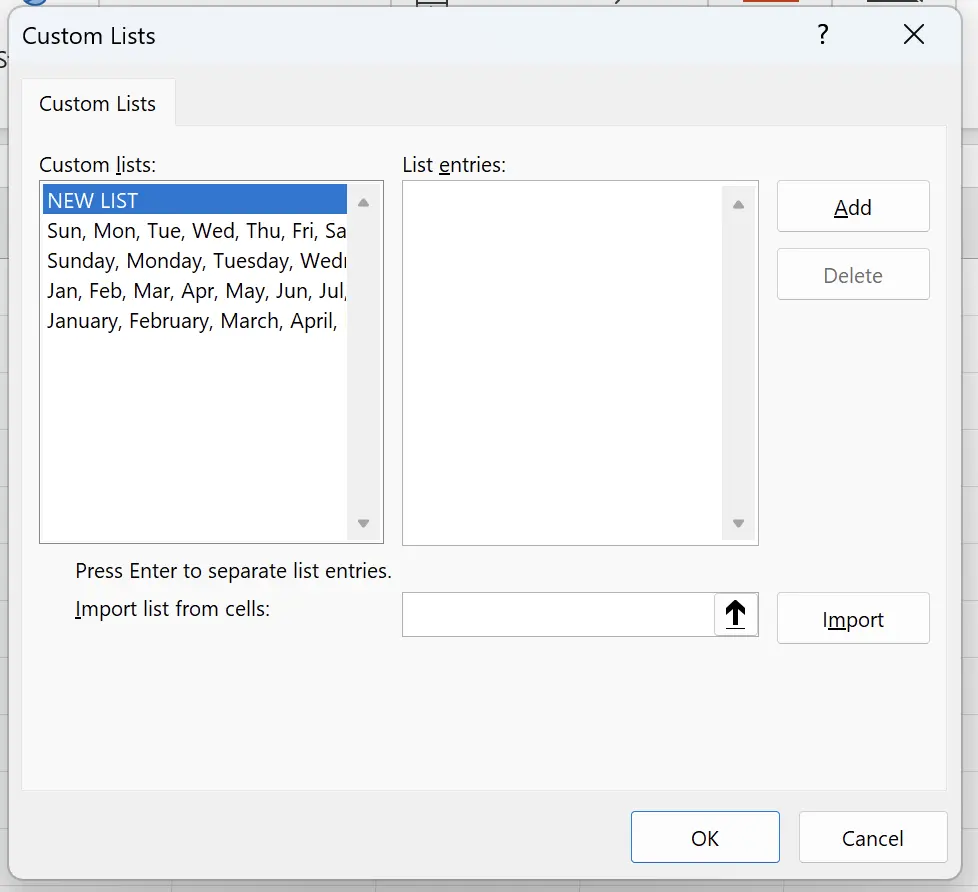
9. 🎉 Finish! 🎉
Author's Note: I hope you can feel the effort I put into these tutorials. I hope to create a series of very easy-to-understand Excel tutorials.If it is useful, help me share these tutorials, thank you!
Follow me:
Related Tutorials